Technical Insight
Probe propels IR thermal microscopy to a new level
Adding a tiny probe to an IR microscope improves its temperature measurement capability, in turn giving new insights into the local heating profile of HEMTs and LEDs, according to a UK team comprising Chris Oxley, Richard Hopper, Dominic Prime, Mark Leaper and Gwynne Evans from De Montfort University and Andrew Levick from the National Physical Laboratory.
Devices are being driven at higher and higher power densities. Cranking up the current in LEDs increases their brightness, making them suitable for deployment in car headlights, projectors and general illumination. Meanwhile, the emergence of RF transistors made from GaN rather than GaAs has increased the W/mm2 figure by an order of magnitude.
Creating these new chips - which can extract far more performance from the same-sized footprint - is helping to drive the compound semiconductor industry forward. Customers incorporating these chips into their products are able to buy fewer of them, making whatever they build not only cheaper to produce, but also simpler, smaller, lighter and potentially more reliable.
It is very rare to enjoy gains without paying a penalty somewhere, and in this case it is the issues relating to a hotter device. Temperatures tend to vary across the chip, creating localised hot spots that are seen as a common cause of device failure. Exposing their location and recording the local temperature offers an important first step on the road to improving the thermal management of the chip and ultimately increasing its reliability. Raman thermography offers one well-developed approach to uncovering local temperatures on a chip. This technique can extract material temperature from the shifts in the wavelength of monochromatic light interacting with crystal vibrations. The great strength of this technique is its high spatial resolution – sub-micron (~500 nm) measurements are possible. However, building-up a temperature profile of the device demands raster scanning of the monochromatic source, a laser spot, across the chip’s semiconductor surface.
Obtaining a good temperature map takes a long time, because Raman signals are notoriously weak. Individual measurements require several seconds or more, and mapping out the temperature of an entire device can be impractical. Further, if temperature profiles are required across gold contact and semiconductor areas, then measurements have to be made from the back surface of the device.
While faster measurements are possible by turning to infrared (IR) microscopy, the technique has two major drawbacks: inferior spatial resolution and greater uncertainty in the local temperature. Like Raman thermography, diffraction defines the fundamental limit of the spatial resolution. However, while Raman thermography often uses excitation from a 532 nm argon ion laser or 632 nm HeNe laser, IR emissions are passive and the microscope collects radiation typically spanning the 2-5 μm range.
Emissivity issues
This inherent weakness, a diffraction-limited spatial resolution, is impossible to address. However, there are steps that can be taken to tackle the other drawback of IR microscopy - poor accuracy of temperature measurements. This problem stems from uncertainties associated with the emissivity of the local surface (emissivity is a measure of how efficient the surface is at emitting radiation, and is highest for a perfect blackbody).
The conventional approach for catering for variations in emissivity begins by placing the device on a heated stage under the IR microscope objective and bringing it up it to a known temperature, which is measured by a calibrated thermocouple.
An IR microscope collects radiation from different parts of the heated electronic device. By knowing the radiation emitted from a blackbody at the same temperature and over an identical range of wavelengths, it is possible to compute the surface emissivity across the device.
The next step is to power up the device, measure the radiation it emits, and then calculate its temperature profile using known emissivity values. With this approach, hot surface areas can be identified very quickly.
However, the accuracy of these temperature measurements relies on accurately knowing surface emissivity, which can be a challenge. Materials employed in many III-Vs, including nitride devices, have low emissivity, high reflectance and/or high transparency to infrared radiation.
For example, gold, which in many instances is used for contacts and interconnections, has an incredibly low emissivity (it is about 2 percent of that of a blackbody) and strongly reflects background radiation, which interferes with the surface emissivity measurement. The upshot is an ‘apparent’ higher measured surface emissivity.
Another issue is that semiconductor materials have different degrees of transparency to IR radiation. This means that radiation is not just collected from the front surface – it can also come from material interfaces and the back surface. The type of bond (eutectic, epoxy etc) to the package tends to govern the intensity of radiation stemming from the back surface.
The interfering IR radiation from these sub-layers also gives rise to an apparently higher surface emissivity, leading to subsequent temperature calculations that are lower than the actual temperature.
Traditionally, this problem is addressed by coating the device with a high emissivity coating, but this can visually obscure the device and cause heat spreading. In addition, spatial temperature resolution suffers, and there is also a greater likelihood of device damage.
A tiny probe
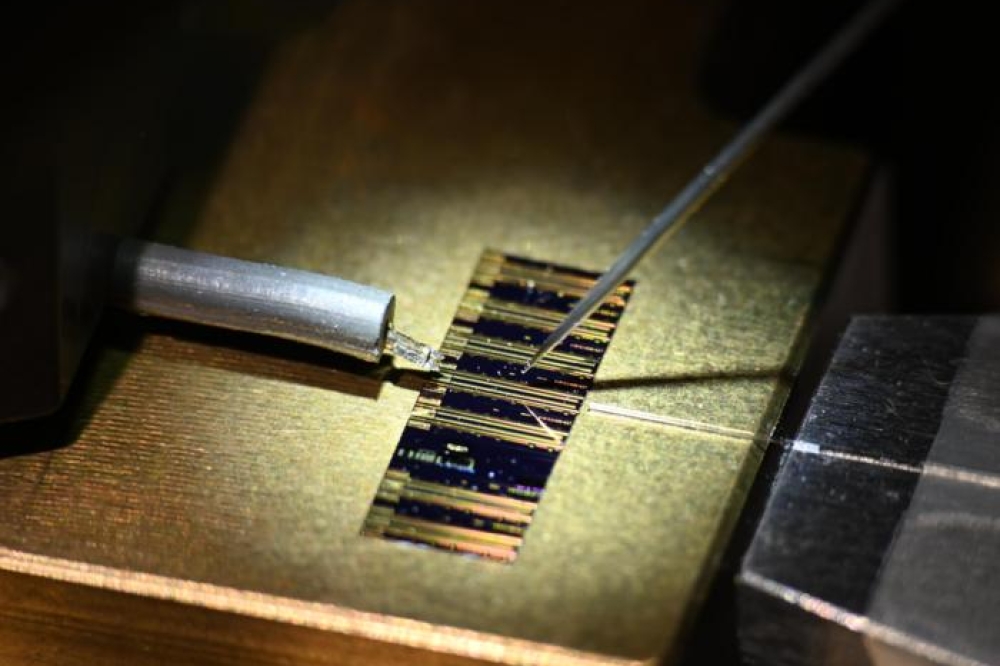
At De Montfort University, which is based in Leicester, UK,we have developed a novel IR micro particle sensortechnology that overcomes the problems of performing IRtemperature measurements on low emissivity and highlytransparent materials. The IR micro-particle carbon basedsensor, which has a high and known emissivity, is placedin isothermal contact with the surface of the device. TheIR radiation emitted by the micro-particle sensor iscollected by the microscope (Figure 1) and used to obtaina more accurate indication of the surface temperature,which is now independent of the material properties of thedevice under test.

Figure 1: The Quantum Focus IR microscope has a 256 x 256 pixel InSb detector array cooled to 77 K to detect radiation in the 2-5 μm wavelength band. Using a 25x objective the spatial resolution is around 3 μm over a field of view 230 μm x 230 μm. The temperature sensitivity is 0.1 °C and it has a temperature range of 300 °C. The instrument has been provided with the capability of DC and RF probing, enabling electrical bias and electrical measurements to be made during thermal characterisation of the device
The micro-particle sensor heats up very rapidly, enabling temperature measurements to be made without resorting to lengthy acquisition times. Three-dimensional thermal calculations indicate that the thermal time constant for a 3 μm-diameter micro-particle sensor is in the microsecond region, which is three orders of magnitude less than the millisecond sampling rate of the IR microscope. The size of the micro-particle has very little impact on the level of emitted radiation density, so long as its diameter exceeds approximately 8 μm. If the particle is smaller, the radiation level is lower – it is 25 percent less when the particle’s diameter is 3 μm. This fall in intensity probably stems from the combination of the onset of the diffraction limit of the microscope and quantum-like effects within the microparticle.
We have directly calibrated our micro-particle sensor by measuring its emission over a range of temperatures (Figure 2 shows a typical calibration curve for a 10 μm diameter IR micro-particle sensor). The micro-particle sensor can be viewed as a “pseudo contact-less thermal probe” that can be moved in essence by controlled steps across the front-face of a device (metal and semiconductor areas) to build up its surface temperature profile. The device being measured remains in a circuit/package configuration required for the application.

Figure 2: Radiance vs. temperature calibration curve (10 μm diameter micro-particle)
The method is complementary to Raman thermography, as temperature measurements can be extended across metal regions. We have found that the peak surface temperature measurements on a TLM AlGaN/GaN heterostructure agreed well with Raman measurements made on the same device under similar conditions.
Our IR microscope with a micro-particle probe has mapped the temperature profile of various devices. This includes the channel region of an AlGaN/GaN HEMT (see Figure 3), which was biased with a drain-source voltage of 10 V and a gate-source voltage ranging from 0 to –5 V. The results obtained by this method have been compared with those produced by conventional IR temperature measurements (see Figure 4).

Figure 3: Imaging showing the position of the micro-particle sensor on the HEMT

Figure 4: Peak temperature rise in the channel region of an AlGaN/GaN HEMT measured using microparticle and conventional IR techniques. Conventional IR results were measured at Position 2
The technique shows the potential of being able to map the surface temperature inside the 5 μm channel region without having to coat the device with a high emissivity coating. The problems in uniformly coating such a small channel will be huge, with non-uniformity giving rise to anomalous temperature measurements. To make matters worse, the coating may substantially change performance of the transistor. Further, the micro-sensor can be removed whereas the coating cannot.
Another class of device we have studied is a whiteemitting, AlGaN phosphor LED. This device produces strong optical emission in the 0.4 - 0.8 μm spectral range, and a very weak output in the 2 - 5 μm IR waveband. Conventional IR is unsuited to this type of measurement, because the phosphor material is semi-transparent to IR radiation. Turning to our ‘micro-particle’ sensor approach (see Figure 5) sidesteps this issue, providing a direct measurement of the LED’s surface temperature (see Figure 6).

Figure 5: Micro-particle placed on the junction area of the diode(Inset) Optical image of the diode, the lens has been removed for access to the diode.

Figure 6 The temperature of the junction was monitored with increasing DC power to the diode and compared with a reading from miniature (50 μm diameter) thermocouple bonded onto the package next to the diode
Our approach measurement offers the feasibility of thermal mapping the front-face of the LED, as the measured emission in the 2 to 5 μm waveband will be maximised by the high emissivity ‘micro particle’ sensor. Also, we believe this radiation will be focused by our microscope and any radiation in the 2 to 5 μm band emitted by the LED will be seen as weak, out-of-focus background radiation. Thermal mapping of the front-face of the LED will provide an improved measurement of the maximum junction temperature and will assist in identifying hotspots and therefore potential failure points.
Our tool also outperforms the conventional IR microscope in delivering a more accurate temperature profile of a MEMS micro-heater. While conventional IR measurements mistakenly record lower temperatures on both the gold metal heater and the optically transparent silicon dioxide layer, our technique offers a more realistic thermal profile, with an exponential fall-off in temperature recorded from the heater element to the cooler region of the device.
Validation of the measurement (Figure 7) was carried out by knowing the thermal coefficient of the resistor heater. This enabled plotting the average temperature of the heater and comparing this with the micro-particle sensor measurement (Figure 8) at a single point on the heater and over a range of DC input powers. These measurements have enabled us to make more accurate thermal maps of the sensor region of MEMS devices used as high performance gas sensors.

Figure 7: Comparison between micro-particle and conventional IR measurement on a MEMS device

Figure 8: Comparison between micro-particle at a single point and electrical measurement on a MEMS device
The metal surface and delicate nature of the heated membrane precludes Raman thermography and thermal probing using a miniature thermocouple. We have made similar measurements to assist in the optimisation of thermal heaters used in electron microscopy. We believe this work will pioneer the way forward in the development of pseudo-contactless micro-sensors which can be positioned and used to scan across the surface of a structure to enable 2D temperature mapping. The sensors described are already much smaller than miniature thermocouples, which inherit the thermal mass of external connections to measurement equipment and the problems of attachment to the device.
The essence of the technique may enable the development of moveable nano-scale thermal sensors to temperature probe the coming generations of nano-scale devices.
The authors acknowledge EPSRC (EP/C511085/1) and emda for partially funding this work. They also thank many organisations for samples, including Bristol, Sheffield, Cambridge Universities ,e2v (Lincoln), Silson Ltd, and the National Physical Laboratory (NPL).
© 2011 Angel Business Communications. Permission required.
Further reading
P.W Webb IEE Proc, 138, 390 (1981)
C. H. Oxley, et al SSE, 54 63 (2010)
C. H. Oxley et al KTN workshop on nanotechnology in European Semiconductor Conference in Cardiff, 2009.
R. Hopper et al Measurement and Science Technology 21 045107 (2010)

